As a professional painter, I know how important it is to get the most out of your tools. A good paint roller can make a world of difference in achieving a smooth, even finish, but if you don't properly clean it after each use, it can quickly become unusable. Cleaning your paint rollers after a job not only saves money but also ensures consistent results for future projects. In this blog, I'll guide you through the best practices for cleaning paint rollers so they stay in great shape and ready for reuse.
Why Clean Your Paint Rollers?
Before we dive into the cleaning process, let’s understand why it’s essential to clean your paint rollers thoroughly:
- Cost Efficiency: High-quality paint rollers can be expensive, so cleaning them extends their lifespan and saves you money in the long run.
- Quality Results: Dried paint or debris on a roller can ruin your next paint job, leaving streaks or uneven finishes.
- Eco-Friendly: By reusing rollers, you reduce waste and your environmental footprint.
Whether you’ve used your roller with water-based paints or oil-based paints, there’s a specific method to clean it properly. Let’s break it down step by step.
Step 1: Remove Excess Paint
Before cleaning your roller, remove as much paint as possible:
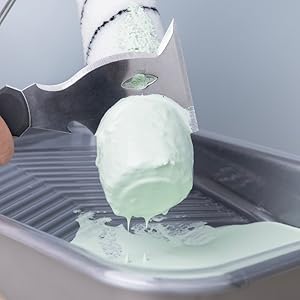
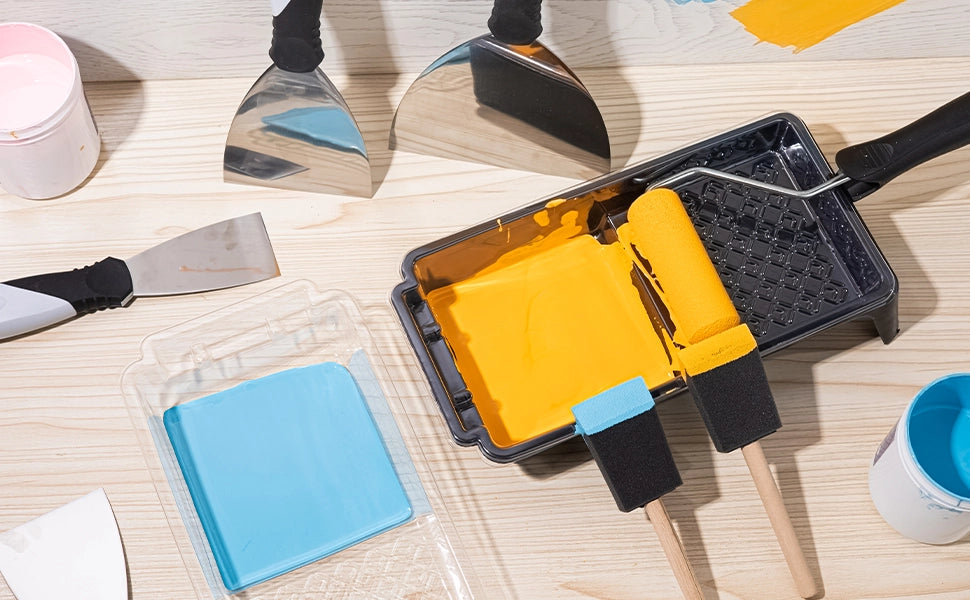
- For Water-Based Paints: Run the roller along the edge of your paint tray to squeeze out excess paint. You can also use a paint scraper or the edge of a putty knife to press the paint out of the fibers.
- For Oil-Based Paints: Follow the same process, but keep a disposable container nearby to catch the leftover paint.
Pro Tip: Do this while the paint is still wet—once it dries, cleaning will be much harder.
Step 2: Cleaning Water-Based Paint Rollers
Water-based paints (like latex or acrylic) are the easiest to clean. Follow these steps:
- Rinse Under Warm Water: Place the roller under a stream of warm water. Use your hands to gently work the paint out of the fibers. Rotate the roller as you rinse to ensure all sides are cleaned.
- Use Soap for Stubborn Paint: If paint remains stuck, add a small amount of dish soap to the roller and gently scrub using your hands. Avoid using harsh brushes, as they can damage the roller fibers.
- Rinse Thoroughly: Continue rinsing until the water runs clear. This ensures no paint residue is left behind.
- Shake Out Excess Water: Once clean, shake the roller to remove as much water as possible.
Step 3: Cleaning Oil-Based Paint Rollers
Cleaning oil-based paint rollers requires a bit more effort since these paints are not water-soluble. Here’s how to do it:
- Soak in Paint Thinner or Mineral Spirits: Fill a bucket or a disposable container with paint thinner or mineral spirits. Submerge the roller and let it soak for a few minutes to dissolve the paint.
- Work the Paint Out: Wearing protective gloves, gently massage the roller to work the paint out of the fibers. You can also use a wire roller cleaner, which is specifically designed to scrape and clean rollers.
- Rinse with Fresh Solvent: Replace the dirty solvent with clean paint thinner and rinse the roller again to remove any remaining residue.
- Wash with Soap and Water: Once the paint is gone, wash the roller in warm, soapy water to remove the solvent smell and any residual chemicals.
- Dry Thoroughly: Shake out excess water and let the roller air dry completely before storing it.
Step 4: Drying the Roller
After cleaning, drying the roller properly is crucial to prevent mold or damage:
- Use a Roller Spin Cleaner: For a quick drying process, you can use a roller spin cleaner. This tool spins the roller, shaking out water and fluffing the fibers.
- Air Dry: Leave the roller to air dry in an upright position or hang it from a hook. Make sure it’s in a well-ventilated area and completely dry before storing it.
Step 5: Store the Roller Properly
Once your roller is clean and dry, proper storage is key to ensuring it stays in good condition:
- Avoid Crushing the Fibers: Store the roller in its original packaging or a clean plastic bag to keep it dust-free.
- Keep in a Dry Place: Moisture can ruin the roller, so store it in a dry, temperature-controlled environment.
Common Mistakes to Avoid
- Skipping the Cleaning Process: Letting paint dry on the roller will make it nearly impossible to clean and reuse.
- Using Harsh Chemicals for Water-Based Paints: Only use paint thinners or solvents for oil-based paints. For water-based paints, warm water and soap are sufficient.
- Improper Drying: Storing a roller while it’s still damp can lead to mold growth and unpleasant odors.
Final Thoughts
Cleaning your paint rollers doesn’t have to be a tedious task. With the right approach, you can keep your rollers in excellent condition and save money by reusing them on multiple projects. By following these steps, you’ll ensure your tools are always ready to deliver professional-quality finishes.
Remember, a little maintenance goes a long way in preserving your tools and ensuring your paint jobs remain flawless. Happy painting!


0 comments